Thursday, January 26, 2012

Mushrooms in Cream with BEER!

Thank you to everyone who messaged me on Facebook or Twitter giving me feed back about the blog! Your comments really do keep me going.

Last night after packing up the left over soup in a tupperware I decided that I was still hungry, and potato and leeks just were not hitting the spot (however, it was a fantastic lucnh today) I had the creative juices flowing and decided to try my hand at another first, Mushrooms in Cream.

I guess mushrooms in cream is really more of a sauce then a actual dish, but the possibility's are endless. You can pair it with chicken breast, pork loin (as I did), pour it over rice, pasta or risotto, hell, I would even try it over spaghetti squash! (Ooooo! That's going in the list!)

I have to admit, I'm not overly adventurous in the mushroom department. I opted to go with your everyday, run of the mill white mushroom, but I strongly encourage you to branch out and try a wide variety. Baby portabello's or chanterells would be great with this recipe.

Start with 2 tablespoons of oil and 2 of butter in a medium pan over medium heat. When the butter has melted, toss in your sliced mushrooms. In the words of Julie Powell " Don't crowd the mushrooms or they won't brown"

The light in my kitchen makes baby kittens cry


The browning process takes about 12 - 15 min. They should be tender and filling your kitchen with a wonderful aroma. Now add 4 cloves of minced garlic, 1/3 teaspoon of salt, a pinch of black pepper and 1 tablespoon of fresh thyme, stems removed and finely chopped. Saute that for about 2-3 min.

Now, if you have decided to make a meat with this, I strongly recommend you cook it in the mushroom mixture from the very beginning, because now we are going to deglaze the pan.

Our good friend Wikipeda says ;
Deglazing is a cooking technique for removing and dissolving caramelized bits of food from a pan to make a pan sauce
It sounds super scary, but I promise its not. Really all it is is adding liquid to get all the last bits of flavor off of the pan. You can use anything you like, wine, brandy, broth, water, but in this case, I used beer! Fremont Brewery's Abominable winter ale to be exact.

A great tip my mother gave me a few years ago after a terrible experience with a wine and cheese sauce is "Don't cook with booze you wouldn't drink." Balance that out with not drinking it all before it makes it into the pot and you're set.

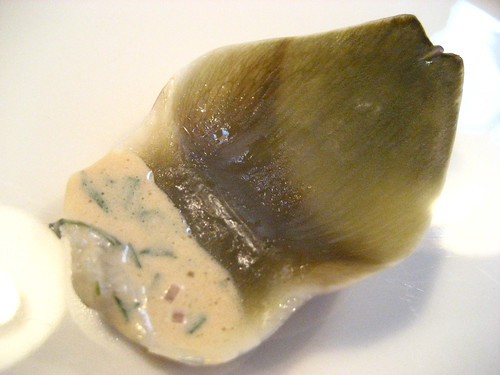
Back to our mushrooms, taking them off the heat and removing any meats you may have been cooking in them, add 1/4 cup of whatever liquid you have decided to use. Place the pan back on high heat to evaporate off the liquid, should be about 2 min. Continuously stir and be sure to scrape the bottom of the pan, we want all that deliciousness in the sauce. Once the liquid has mostly cooked off, add 2/3 cup of heavy cream and reduce heat to simmer for 2 min. Remove from heat and pour over what ever you have decided to serve it with.

Why yes, I am using inside my cupboard as a back drop
 The mushrooms and herbs ad a lot of flavor, but what ever you choose to deglaze with will really define your sauce. So choose carefully depending on what you are pairing it with.

2 Tb oil
2 Tb butter
1 lb mushrooms
4 cloves garlic, minced
1 Tb fresh thyme
1/3 tea salt
Pinch black pepper
1/4 cup deglazing liquid of your choice
2/3 cup heavy cream


This recipe was influenced greatly by a entry from blog called An Edible Mosaic which features beautiful food porn. Her photography is truly amazing.

Tuesday, January 24, 2012

A few Starting Notes

Wither you are are experienced culinary wiz or a fumbling noobie there are a few things to remember.

Master Chef
  1. Read the Directions.  All of them. From start to finish BEFORE you start. I can't stress this enough. With every recipe you use. I have personally forgotten many a step or to purchace an ingredent because I didn't read everything before I started. So just do it. Moving on
  2. Conversions.Measurements are a funny thing. Unfortunately, the world has been unable to whole-heartedly agree on one standard of measurement (I'm lookin' at you, America!) Just be aware as to what your recipe calls for and what units are printed on your measuring utensil. Something to remember for baking especially, don't round your conversion. Baking is one of my favorite forms of science, the chemical reactions happening are very important to things tasting right.
  3. Get Fresh. Seriously. I know I know, every one always says that fresh ingredients taste better but its true. And its the little things that matter. I recently went to a spice shop and got fresh ground black pepper and it honestly made a WORLD of difference. And buying by weight was way cheaper then at the grocery store. So think about that.

Potage Parmentier

Ah yes, Potage Parmentier, or if you prefer in English, Potato and Leek soup.

Yes, I know in my post yesterday I promised another really impressive french sounding dish, but I decided to change things up for 2 reasons.

1. Of the comments I received yesterday about the resurrection of the blog was from my friend Sam in Victoria. He said that he was interested in the blog as he is just learning to cook. So rather then scaring him off with something I myself am slightly on edge about making, I thought I should start of with something much more simple, while still providing the fancy french name. (Because lets be honest here, Potage Parmentier sounds WAY more impressive)

2. It would be a shame to make this fancy french thing for just myself, and have no one to Ooooo and Ahhhh at how impressive it is (unless I fuck it up, which is a very real possibility). So guys, if you're in Seattle on Thursday, I have space for two at dinner. Hit me up.

I am a huge fan of soups, and this one is in the top three. It requires few ingredients, has a short prep time and its really hard to screw up.

Usually I would use your standard Russet potato, but this time I decided to use sweet potato. (Note: Sweet Potato and Yams are in fact different, be sure you are using the right one)


Sweet potato's are larger then Russet potato's, they tend to be more firm, and are much lower in starch. 

Begin by peeling the potato and dicing it into small chunks. Were going to use about 2 cups. 

Next prepare the leeks. If you have never used leeks before here's come tips. These are big stalky things, and are usually sold by weight...... and you're going to throw most of it away.


Cut off the end with the roots and the end with the leafs about where the stock has turned completely green. Using a knife, cut the stalk in half lengthwise. Under cool water, wash the inside of the stalk, fanning out the layers, but keeping them together. Dirt loves to hide in these little folds.
Next, chop the leeks. You need about a cup and a half worth. Place everything in a pot with 1/2 tablespoon of salt and 4 cups of water. Bring that to a boil, partially covered and then reduce heat to a simmer for 45 min.

Once the vegetables are tender remove from heat and mash them up with a fork until creamy. Taste the soup now and adjust the seasoning. Add pepper to taste. Off the heat, add 2-3 tablespoons of heavy cream or 1.5-2 tablespoons of butter. (This is one of those situations where you shouldn't substitute margarine over butter, its the dairy we are looking for, not oil) Garnish with a large pinch of minced parsley or chopped chives.


2 cups potato - diced
1.5 cups leeks - washed and sliced
4 cups water
1/2 Tb salt
Simmer for 45 min

2-3 Tb heavy cream OR 1.5-2 Tb Butter
Minced parsley or chopped chives

Potage Parmentier


Monday, January 23, 2012

Version 2.0

Ive decided to re-boot my blog because, well.... its the grown up thing to do.... or something.

Recently I have been re inspired to cook. Hurray!

This time I will be doing it solo, for the most part and  hope to post several times a month. To many that may not seem like very much, but lets be real. Living alone, working full time, traveling and a busy roller derby schedule, Im lucky to make a meal at home not consisting of something out of a box more then a few times a week. It can't all be gold.

As with the previous format, I will be posting photos, recipes, resources, tips, tricks and how to's. I will also try to offer both herba and carnivore alternatives as often as possible.

I hope to get to a point of having guest contributors, for your reading and eating pleasure.

My motivation? To write more, eat better (better tasting.... not always better for you, a girls gotta have priority's) and stretch both my imagination and skills in the kitchen.


My inspiration? My very culinary skilled parents, the Julie/ Julia project (and movie, and book), the stack of cook books that showed up on the free table of my building and the various tasty foods who's vast potential has yet to be unlocked!

I have bought most of the ingredients for Oeufs a la Bourguignonne, and plan to be making that some time this week, so have that to look forward too.

Friday, November 13, 2009

Chai OH MY!

Wowie! Look at this! 2 posts in less then a week! Looks like @fiercekitty's #createsomething Vlog post (found here) has really motivated me go get my butt in gear.

About a month ago I discovered something wonderful..... I now like LOVE Chai! So after my roomie , Mirical and I plowed through a box in less then a week, I decided that it was time to test out yet another Arkell Family cook book recipe.

Not only is this chai easy to make, but it has an extra layer of deliciousness added to it by being made... are you ready for this.... in your super fancy SLOW COOKER!!!!

Because this recipe requires a lot of spices, I strongly suggest that you head to your local eastern market's bulk section (or any bulk section for that matter) and pick up some supplies on the cheap. (ahh cheap.. that's one of my favorite words!)

So here's the skinny!


Take your slow cooker pot and add 5 cups of cold water and 3/4 cup of sugar.

Grab a square of cheese cloth and lay it out. Take 3 cinnamon sticks and snap them in half. Place on the cheese cloth.

For those of you who have never worked with fresh ginger root, there is a fancy trick to getting the soft outer skin off. Using a spoon, scrape all the gray off so you are just left with you yummy yellow ginger. Slice off 3 pieces and place on the cheese cloth. Add 1 bigish teaspoon of cloves.

Grab the corners of your cheese cloth together and secure so you now have a lovely spice sack.

Toss your sack in the water and add 1/2 teaspoon of ground cardamon, 1 1/2 teaspoon of nutmeg.

Cook all this on low for about 4-6 hours, or if your inpatient (like me) on high for about 2.5 hours.

Take out the spice bag and add 6 cups of milk (we discovered that there is no taste difference if you use powdered milk or real milk, so if you wanna save some cash, this is a good way to go) Also, toss in 8-10 tea bags. I use orange pekoe, earl gray or English breakfast.Cook for about another 30 min and then toss the tea bags.

Your Chai is now ready to be enjoyed, and as an added bonus, your house now smells amazing.

THE BREAKDOWN!

3 Cups Cold water
3/4 cups sugar
3 cinnamon sticks
3 slices fresh ginger
1 t whole cloves
1.5 t nutmeg
1/2 t cardamon
6 cups Milk
8-10 tea bags

Tuesday, November 10, 2009

Not 'Yo Mama's' Corn Bread

This is a recipe I tried over thanksgiving. I think I changed enough of the ingredient's that I can officially call it my own. (Yay!)

This is not quite a traditional corn bread, but more of a loaf.

Preheat to 350F

In one bowl combine 1 cup corn meal, 1 cup flour, 2 teaspoons baking powder, 1/2 teaspoon baking soda, 2 tablespoons corn starch and 1/2 teaspoon salt. Whisk all the dry ingredients together.

In a separate bowl, whisk together just shy of 1 cup sour cream, a splash of milk, 3 tablespoons honey, and 3 tablespoons melted butter.

Now pour the wet into the dry and mix. This will turn into a dough, rather then the classic corn bread batter.


Now press your dough into a bread tin and bake for 20-25 min. Keep in mind that you arn't trying to brown the bread. You may want to do the toothpick test to make sure it is done. (stick a toothpick into the centre. If it comes out clean you know its done)

This is super yummy with butter on it or cream cheese.

(Sorry for not taking an after shot. I dont know what I was thinking.)

THE BREAKDOWN

1 cup corn meal
1 cup flour
2 t baking powder
1/2 t baking soda
2 T corn starch
1/2 t salt

1 cup sour cream
a splash of milk
3 T honey
3 T butter (melted)

Wednesday, September 9, 2009

Microwave Artichokes

This is another fav from my Arkell Family cook book

Its pretty straight forward and very quick.

 
You'll Need
  • 1-2 Artichokes (Use scissors to cut off the pointy tips of the leafs. They are sharp!)
  • 1 Tbsp Lemon Juice
  • 2 Tbsp White Wine
1. Put artichokes in a microwave safe bowl
2. Pour in white wine and lemon juice
3. Cover and cook until soft. About 7-10 min.
        - keep an eye on it and make sure that all the liquid doesn't evaporate

When its done the leafs should pull off easily.

So now if you have never had artichokes your probably wondering "how the heck do I eat this thing".

 
The base of the leaf is soft and "meaty". Dip this part into your sauce and then scrape it and the meaty part off with your teeth. YUMMY!


Serve with you choice of dipping sauce. I like to make a spicy mayo ( A scoop of mayo with cayenne pepper)

The Arkell's suggest hollandaise sauce.

Thursday, June 18, 2009

Ma's Slaw

I have always been a huge fan of my mom's Coleslaw. Its more sweet then spicy and bitey. (is bitey even a word?)

For this recipe we were complete cheaters and bought the pre-shredded mix.

Here is what mother dearest had to say when I asked for her recipe

"Okay, here's my coleslaw dressing recipe...kinda, cause I don't really measure stuff, you may have to adjust it.
To 1 cup of Mayo, add 2 tablespn white vinegar, 1 heaping tablespn of sugar and some salt and pepper; maybe about 1 half teaspoon of each. That's it."


As far as adjustments, i found it needed a little more sugar and pepper. Also I added raisins!

Yummy Yummy Raisins. Trust me. It totally changes the taste. So good!

Also, just a small note. When your starting to mix things up, your probably going to be thinking " Hmmm I think I need more Mayo" TRUST ME! You don't. Just keep mixing it up.

"Just keep Mixing, Just keep mixing....."

Enjoy!


Tuesday, May 19, 2009

Holy Crêpe

We hope every one had a great May long weekend. Things are starting to look a little more normal in our kitchen. There was very little damage after the flooding. My landlord finally replaced my oven with a shiny new one, and Emmett is back from Berlin!

Our good friend Morgan is pretty famous for his amazing crêpe batter. So after milking the recipe out of him before he went traveling, Emmett and I tried our hands at it.

This recipe leaves lots of room for playing with and adjusting to fit your tastes, also its super simple.

The Recipe
  • 2 Cup Flour
  • 4 Eggs
  • 1 - 1 1/4 Cup Milk
  • 1 Cup Water
  • 1/2 tea spoon vanilla
  • Pinch Salt
I think my favorite part about this breakfast, is that the batter gets better with age. It will keep in the fridge (covered of course) for about 3 days. (and day 3 is the best!)

So after you mix everything together in a bowl, I like to pour it into something with a spout. Like my big measuring cup. But this is your call.

In a frying pan, over medium heat, pour your crêpe batter into the middle of the pan. Then tilt the pan to evenly spread the batter. It wont take long before its time to flip. You aren't looking for a golden brown like you would be with pancakes. Just Cooked.


Once you flip it, it should only need about another min to be done.

Now for the fun part.

You can top it with just about anything you can think of. Some topping you can try;

-Peanut butter
-Honey
-Jams and Jelly's
-Nutella
-Maple Syrup
-Bananas
-Fresh Berries
-Whipped cream

The possibilities are ENDLESS!


Monday, May 4, 2009

Water Water Every Where.... *sigh*

So just as Emmett and I headed into our kitchen to start making a nice home cooked meal for out friend Scotty from Calgary, we notice a reoccurring puddle on the floor. Open the cupboard to under the sink to find a slow drip next to a tap. Any time we touched the tap to attempt to stop the leak, the drip got worse.

So to make a long story short..... We had take-out instead.

Sorry Scotty, next time.

In the mean time, please enjoy an episode of Cooking With Harmony.